About the Live Data Options For This Block dialog
The Live Data Options For This Block dialog appears when you create a new live loop annotation, add a point to the Watch Window from within the Watch Window, or choose to edit an existing live loop annotation or Watch Window point. Use it to specify which block you want your live loop annotation or Watch Window to monitor, and to set options for how that block's live data should be displayed.
![]() Note: While the Watch Window and Live Loop Annotation functions share the Live Data Options For This Block dialog, different options are available for each function.
Note: While the Watch Window and Live Loop Annotation functions share the Live Data Options For This Block dialog, different options are available for each function.
Use the Live Data Options For This Block dialog to:
- Choose which block you want to monitor using a live loop annotation or the Watch Window.
- Choose whether to display data in a live loop annotation as a single value or as a bar graph.
- Set the maximum and minimum values that will be displayed on the vertical axis of the Watch Window plot or live loop annotation bar graph.
Selecting the block for which data is to be displayed
Live output data for any block can be displayed in Live Loop Annotations or in the Watch Window.
Specifying a block by Loop, PCU, Module, Block
- Select the Value For Block Number option under the Specify Value to Monitor heading.
- Enter the loop, PCU, module, and block numbers in the Value For Block Number boxes.

Specifying a block by tag name
- Select the Value For Tag Name option under the Specify Value to Monitor heading.
- Type all or part of the name of the tag you want to monitor in the Tag Name box and click Search.
- Choose the tag you want from the list in the Value For Tag Name box.
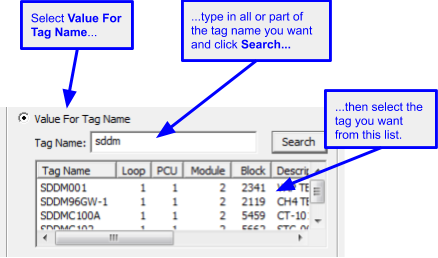
![]() Note: Once a block has been added to the watch window, you cannot change it's Loop, PCU, Module, or Block number using the edit menu.
Note: Once a block has been added to the watch window, you cannot change it's Loop, PCU, Module, or Block number using the edit menu.
Selecting the module for which Module Status is to be displayed
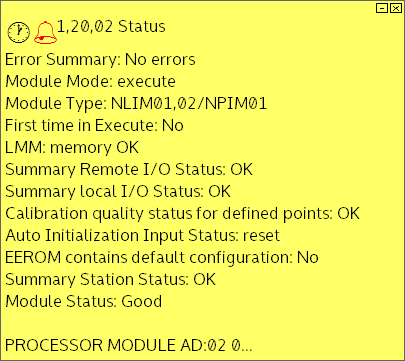
You may also view the status of the module by clicking Module Status in the Live Data Options For This Block dialog. Live module status for any module can be displayed in either Live Loop Annotations or in the Watch Window.

By doing so, the following annotation will be created:
Setting the description and update interval

- Description: You can add a description for the block in the Description field. This description will show up in the Watch Window, in mouse-over tooltips, and in the block headers when data is exported.
![]() Note: If you do not enter a description here, Hyperview will try to generate one. The automatically generated description will never overwrite a description that you have entered. To get an automatically generated description after you have entered a description, delete the description that you entered and then close and reopen the Live Data Options For This Block dialog box.
Note: If you do not enter a description here, Hyperview will try to generate one. The automatically generated description will never overwrite a description that you have entered. To get an automatically generated description after you have entered a description, delete the description that you entered and then close and reopen the Live Data Options For This Block dialog box.
- Update Interval: Specify the number of seconds between data fetches for this block.
Data display options for Live Loop Annotations
Displaying live data
Live data is always displayed on the live loop annotation. Prior to 11.1, the option to show live specs instead was displayed. This has been moved for live specs to display directly on top of the static specs. See Enabling fetching and display of live spec values for more information.
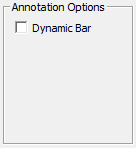
The watch window always shows live data.
Displaying a dynamic bar
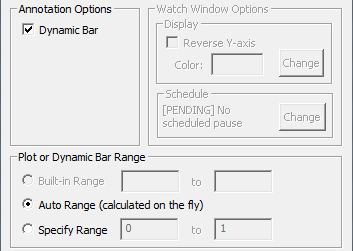
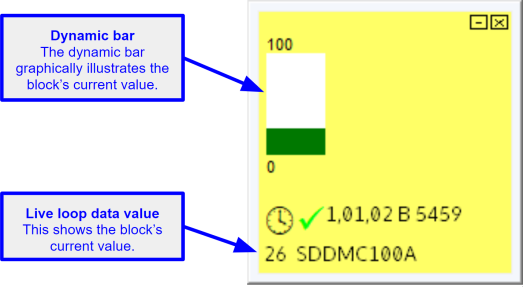
- After selecting Show Live Data for a live loop annotation, you can select the Dynamic Bar to show a bar graph of the data value. By selecting the Dynamic Bar option, the Plot or Dynamic Bar Range will become active. If you do not select Dynamic Bar, the annotation will show only the live data value.
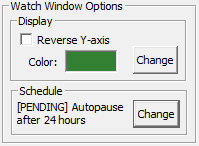
Data display options for block in the Watch Window
Reversing the Y-axis of the plot for the selected block
Check Reverse Y-Axis to vertically reverse the plot display for the selected block.
Changing the plot line color for the selected block
Click the Change button next to the color swatch to specify a color for the plot line.
Change the autopause schedule for the selected block
Click the Change button next to the schedule summary. Use the Watch Window Autopause Schedule dialog to change the schedule.
Note that if the block is used in multiple places in the Watch Window, and is paused in some places but not others, all instances of the block will continue to update. This is because all the data collected for a single block is consolidated, and is available to all instances of the block even if they are paused.
General data display options for both Live Loop Annotions and Watch Window blocks
Specifying the plot vertical range
- If the block you are monitoring has a built-in range, you can select Built-in Range to have the watch window or live loop annotation bar graph use it.
![]()
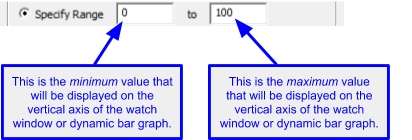
Enter the maximum and minimum values you want, respectively, in the text boxes to the right of the Specify Range button.
- Select Auto Range to have the vertical axis of the watch window or live loop annotation bar graph adjust to the live data it receives.
![]()
- Select Specify Range to set the maximum and minimum values that will be displayed on the vertical axis of the watch window or live loop annotation bar graph.
See also
- Editing live loop annotations
- Creating live loop annotations
- Positioning live loop annotations
- Copying live loop annotations
- Deleting live loop annotations
- Interpreting text and symbols on live loop annotations
- Adding a live loop annotation to the watch window
- Changing the appearance of live loop annotations
- Finding a live loop annotation if you forget which document it is on
- Moving a live loop annotation to a different document
- About live loop annotations
- Managing live loop and text annotations in the Annotation Manager
- Importing live loop annotations