As of DBDOC 11.5 this should no longer be necessary as there is now support for extracting 800xA PG2 graphics directly from AFW files.
This support is for manually exporting PG2 graphics to then be built in DBDOC.
Installation of the Assyst tools
- On an 800xA Engineering station, run the installer. (Note that the tools will not work on any other systems.) This should create the folder "AssystBin" inside "C:\DBDOC".
- You can use the installed "Assyst Tools Controller" (linked in "GMCL DBDOC" in your Start Menu, and by default automatically opened after installation), or you can follow the manual instructions below.
Using the Assyst Tools Controller
The usage of the Assyst Tools Controller is detailed below; if you have any issues with the functionality or other bugs, or think of a feature or function you wish it had, do not hesitate to contact GMCL.
Licensing

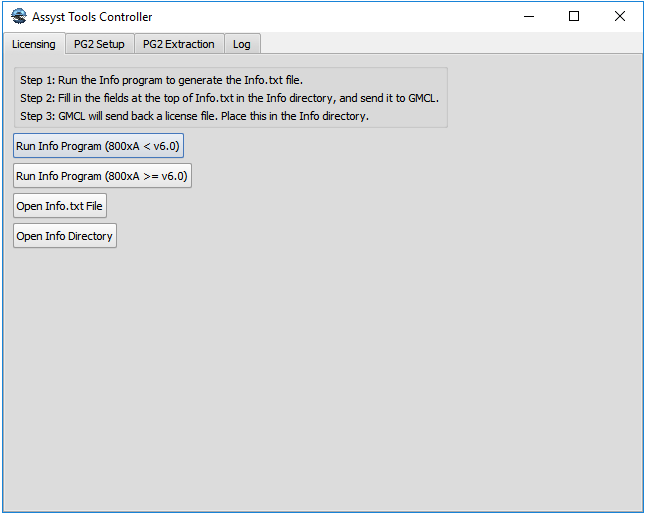
The first tab allows for licensing the Assyst tools. You should start by running the Info program, which will generate an Info.txt file. After filling in the handful of fields at the top of the file (to the best of your ability), send the Info.txt file to GMCL. GMCL will send back a license file for the Assyst tools, which you should place in the Info directory (opened by the corresponding button).
PG2 Setup

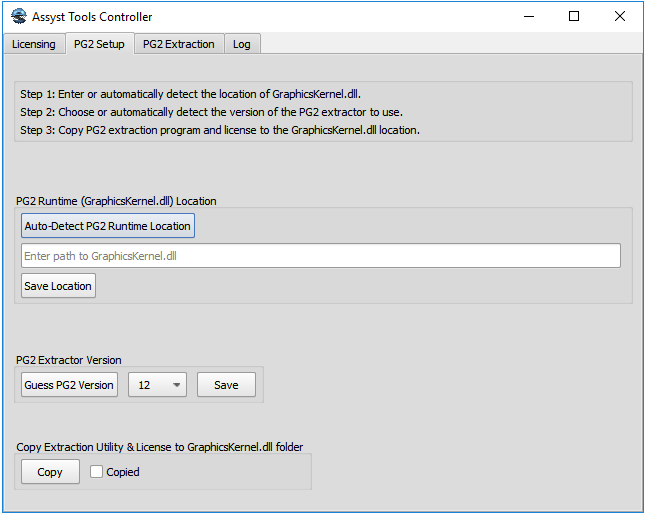
- If you know where the GraphicsKernel.dll file installed as a part of 800xA is located, you can enter the path manually. Otherwise, the auto-detect should find it. Click on the "Save Location" button.
- The PG2 extractor version is roughly determined by the release date of your 800xA version, namely "10" for ~2010 and older, "11" for ~2011, "12" for ~2012 and newer 5.x versions. For 6.x, the earliest releases should be covered by "V6", and as of this writing all later versions are handled properly by "V603" (there appears to have been some sort of change with version 6.0.3, but later versions, including 6.1, do not appear to have any such breaking changes). If you've completed the previous step, the "Guess PG2 Version" should do a reasonable job at selecting the right version based on what we've found from existing clients, but if the version it selects doesn't work you can set a different version and try that. Please contact us if you have to manually select a different version than is automatically picked.
- Once you have both the path and version set, or if you've changed either, you can hit "Copy" to put the extraction utility and license in the right place, behind the scenes. If this is successful, it will automatically tick the "Copied" checkbox, and the next time you load the Controller it will default to the next tab. Conversely, to make it open this tab again next time, you can manually uncheck the box.
PG2 Extraction

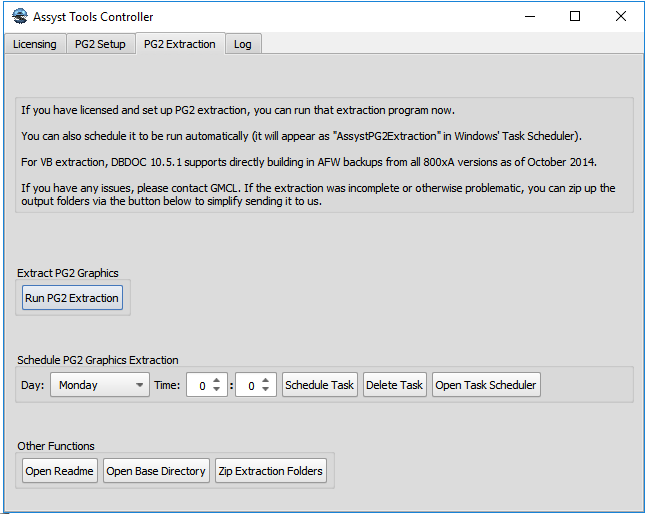
Once you've licensed and set up the PG2 extraction utility, you can run it from this tab.
You can also schedule a task from here, or delete it if you want to schedule a different one. This uses the task name "AssystPG2Extraction". If you'd rather set your own task, you will need to append the argument "-mode=auto", otherwise the PG2 extraction utility will open on schedule but merely wait for a user to press the Start button.
From this tab, you can also view the Readme, open the base directory containing both "AssystBin" (the programs) and "Graphics" (where the "AssystInfo" and "AssystSnapshot" folders with the extracted graphics are located), or automatically zip up the extracted graphics (which will create a .7z file in the base directory).
Log

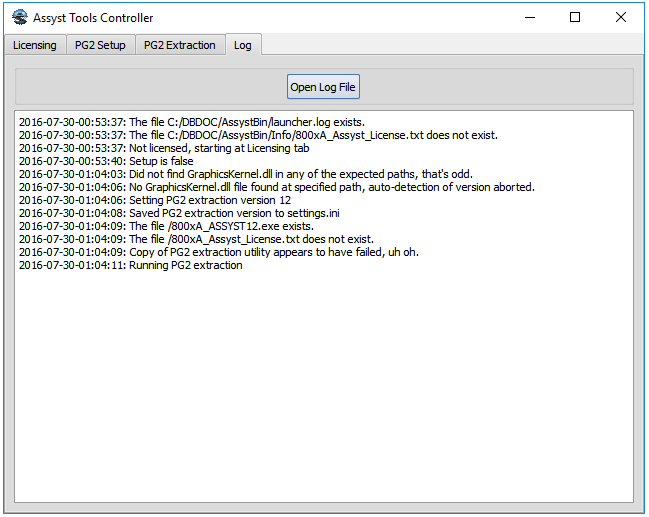
On the Log tab you can check the current session's log for explanations if anything has gone wrong, or open the full log file to view previous errors or debug messages. By default, this log is located in C:\DBDOC\AssystBin\launcher.log. This does not contain any errors encountered by the Assyst tools themselves.
Manual Instructions
If the above instructions do not work for you, please contact GMCL.